Bioinformatic analysis for biologists - part 1
In this three-part series, we will discuss the basics of bioinformatic analysis for ChIP-Seq experiments. These posts are aimed at beginners and biologists with little to no background in bioinformatics. If you work at the bench and have a bunch of ChIP-Seq data waiting to be analyzed by a bioinformatician, why not do it yourself? We have no doubt you can become a skilled bioinformatician in no time!
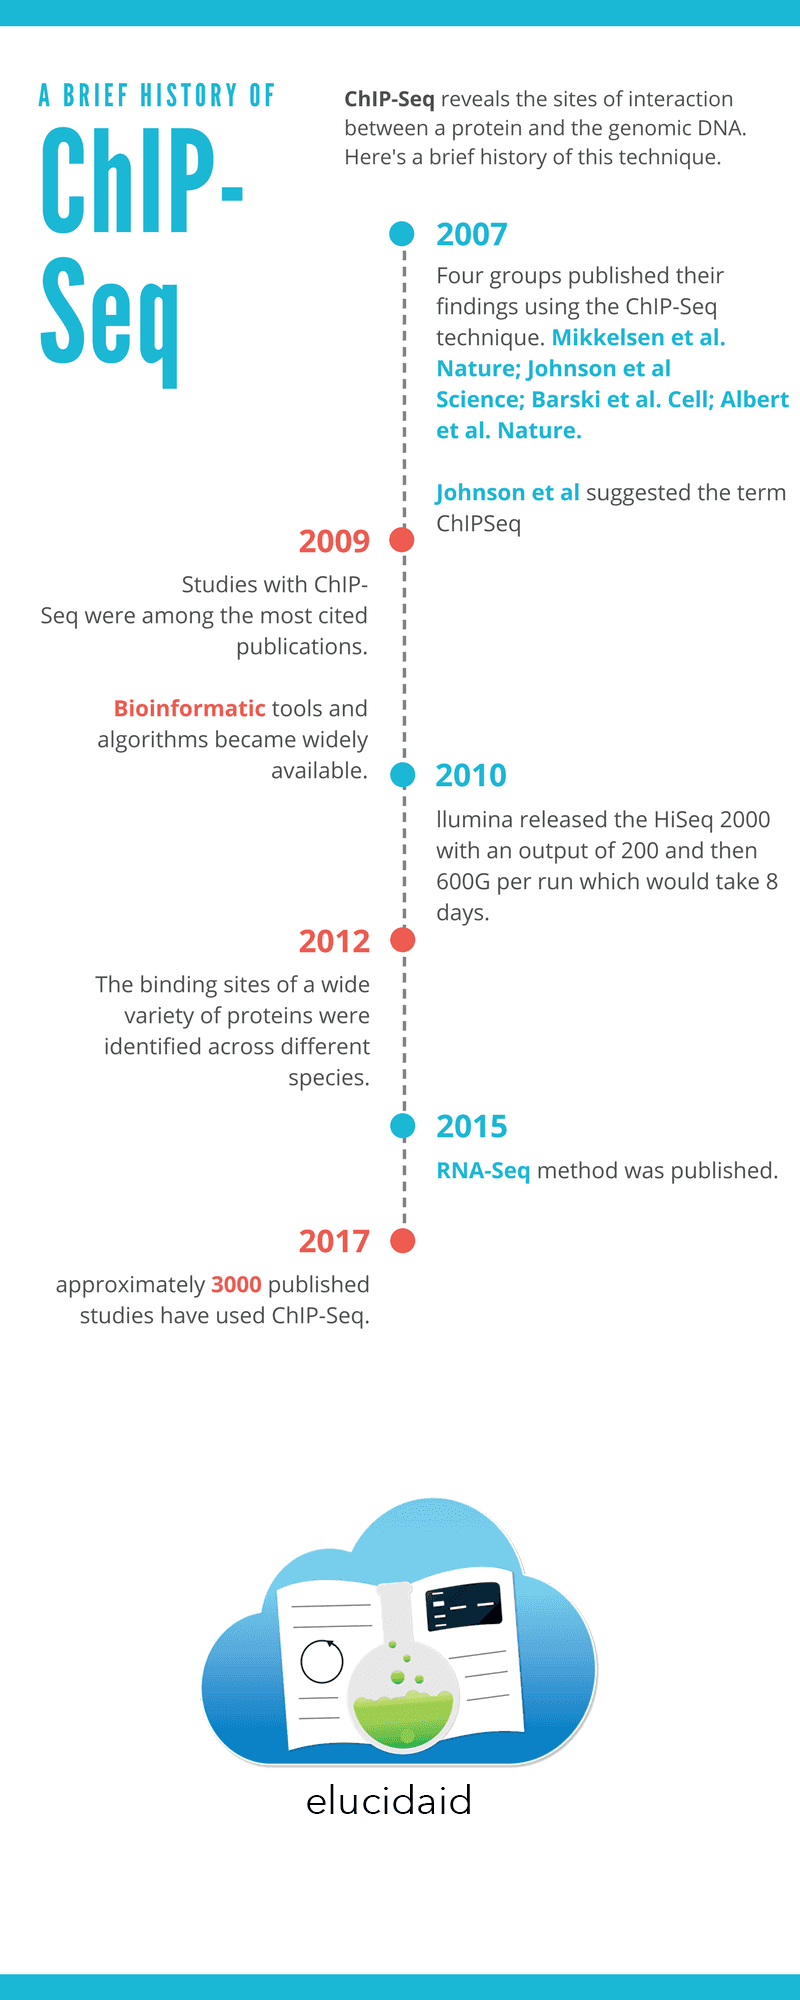
This year we are celebrating the 1o year anniversary of the invention of ChIP-Seq. Therefore, before getting into the details, we have prepared the following infographic to give you a little historical perspective on the evolution of the ChIP-Seq technique.
Okay, let's get started. But before delving into the bioinformatics and computer programming. Let me briefly summarize the library prep and sequencing steps. These are only suggestions, based on what has worked for us.
You may choose to make the sequencing library yourself or outsource this step. We recommend that you perform library in-house because you will have more control over your samples. For example, your samples are more likely to be contaminated with foreign DNA if they are handled in a facility that deals with hundreds of different samples every day. You can use the standard Illumina library prep kits, or choose an alternative kit. We have had good results with Takara/Clontech ChIP Elute Kit and DNA SMART ChIP-Seq kits - We have no affiliation or connection with these companies. We also recommend that you perform library quality control before sequencing. Simply follow the instructions that come with the library prep kits.
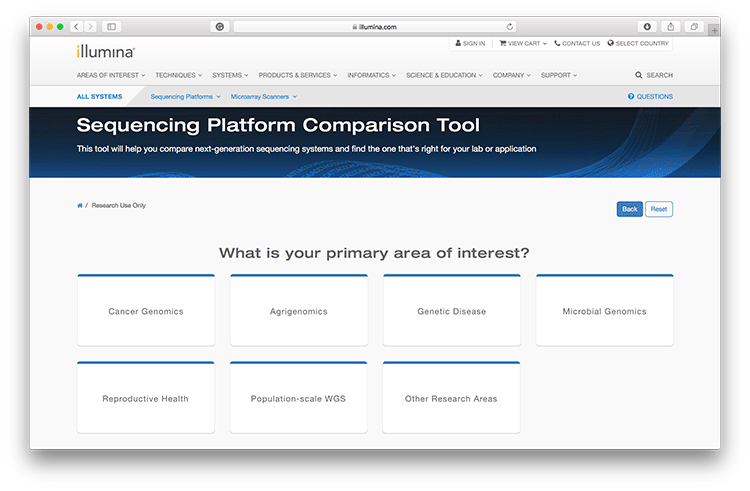
For sequencing, you will need to choose the appropriate technology that you want your DNA to be sequenced with. This will depend on the desired length of the reads, coverage, and single-end vs. paired-end sequencing. The Illumina website has a useful tool that helps you pick the appropriate sequencing platform for your purposes; select your project types such as Cancer Genomics or Microbial Genomics and follow the instructions to find the most suitable solution for your sequencing needs.

Once you have selected the appropriate platform, it's time to look for a facility that can perform the sequencing for you. If you want to outsource sequencing, we recommend you check out the Illumina Certified Service Provider (CSPro) Program. We have had very pleasant experience with GENEWIZ, Inc. (This is not an endorsement, and we are not affiliated with them). After sequencing is completed, you will receive your data on a hard-disk or via a download link (depending on the service provider). It is a good idea to store the data securely and have a backup; ideally one copy on disk and one copy on a server or the cloud.
(1) Pick your pipe!
Before starting to analyze the sequencing reads, it is a good idea to think about a robust strategy that will produce the data that will be useful to you. As a biologist, you are more interested in consistent, reproducible and statistically robust data that can help you address a hypothesis. A bioinformatician, on the other hand, is perhaps more interested in the algorithms and the mechanics of analyzing your data. The two complement each other, and a good biologist can become an excellent bioinformatician. So take a step back, to assess (A) what you have in hand as raw data, and (B) where you want to end up with these data. Going from A to B may entail many complicated algorithms and delicate analysis, or it may be a straightforward path. In any case, the path from the start point (A) to the desired endpoint (B) with all the entailed tools and algorithms are known as a 'pipeline.' Once you have established a robust pipeline that produces what you need, it can be used again and again as long as points A and B to remain the same. Remember, a pipeline can be improved, and as a beginner, it is good to make mistakes and use trial and error to tweak the pipeline until you reach point B. However, it is a good idea to have a solid idea of what you need to produce and an overall strategy of how you want to get there.
In this series, we discuss a simple pipeline where point A is raw sequence files that come out of the sequencing machine, and point B is publication-ready plots that show enrichment of our protein of interest across regions of the genome. This is a simple example that will provide you with the basic knowledge and tools to get you started.
(2) What's your language?
Here, we use two primary tools: Python and R. Both are free, and popular with the community. You can pretty much choose any other programming languages and statistical analysis tool (e.g., MATLAB). However, we found that it is much easier to seek help and get off the ground when using Python and R, because of their huge popularity. We will also use another valuable tool that is the command-line tools that come standard with MacOS machines.
To install R on a Mac computer, you need first to install another tool called 'Homebrew.' In the terminal, type:
ruby -e "$(curl -fsSL https://raw.githubusercontent.com/Homebrew/install/master/install)"
Now install R by typing the following commands sequentially:
brew tap homebrew/science
brew install r
If you there are any errors during installation, google the error message, and the answer will be there!
Python should be already installed on your Mac computer, but it is a good idea to install it again, so you have the latest version. To install Python via Homebrew, run the following command:
brew install python
If you see any errors, it is possible that some dependent code/program is missing from your machine.
(3) Working with raw sequencing data
The first step in our pipeline is to process the raw sequencing files to prepare them for alignment to a reference genome. You may skip this step if the data are ready to be aligned. The files that contain the sequences of the reads are nothing more than plain text files. These include the raw sequences, and additional information relating to each read (e.g., quality scores). The format of these text files is FASTQ. Do not attempt to open these files with any text-editing programs, because these files are huge and they will eat up all the memory and freeze your computer. If you want to have a look at the contents, open the Terminal and use either the 'head' or 'tail' functions. For example to see the first 30 lines of a FASTQ file, type:
head -30 example.fastq
If the files are compressed (*.fastq.gz), you will need to uncompress them, before running the above command.
In addition to 'head' and 'tail,' useful Terminal functions that you may want to know about are 'for loops' (for dealing with multiple files) and 'sed' (for text transformation). For example, in our case, we had to trip the first three bases of every read before aligning the reads to the reference genome. This is because the Takara/Clontech kit that we used for library prep adds three bases at the end of each read. Since these three bases are not from our biological sample, we have to trim them. So we used the following function to loop through every FASTQ file in a folder and trim 3 bases from the end of every read.
First, install a tool called seqtk (follow instructions on their page to install). Seqtk is a tool for processing sequences in FASTQ files. To make this example more simple, we have the seqtk tool and our FASTQ files in the same folder. If they are in separate locations, 'cd' into the folder that contains the FASTQ files, and call seqtk using its full path (e.g. /Users/me/Documents/seqtk-master/seqtk trimfq ...).
cd /Users/me/Documents/seqtk-master/
for file in *.fastq.gz;
do
filename=$(echo ${file} | sed 's/.fastq.gz//');
seqtk trimfq -b 3  ${filename}.fastq.gz > ${filename}.fastq.trimmed.gz;
done
In the first line, we 'cd' into the folder that contains both the seqtk tool and our FASTQ files. The 'for loop' starts on the second line and ends in the last line. It is there to make life easier by looping over every FASTQ file in the folder (we had 12 files). If you are dealing with one or two files you can omit the 'for loop' and only run line 5, by replacing ${filename} with the actual file name. Line 4, gives us the file name without its extension so that we can change the file name from example.fastq.gz to example.fastq.trimmed.gz. Visit https://github.com/lh3/seqtk to learn more about trimming using seqtk.
(4) Alignment to reference genome
To identify the reads in the FASTQ files, we need to align the reads to the reference genome. There are far too many reads to do this manually, so we will need to use an automated tool that can align the reads for us. Alignment is the most time-consuming part of this process because the locations of millions of reads are determined in the genome of interest. There are many tools available that perform alignment, some are faster, and others are more accurate. You may need to experiment with different tools, to identify the appropriate tool for your purposes. For example, you may be dealing with a lot of repetitive sequences or a huge genome. There is a tool for each of these scenarios. Here, we use bowtie2. It is both fast and sensitive, and it is easy to install (click here for instructions).
In the next post, we will discuss the alignment process and some of the options that you can choose from.
81 - 3947253
VAT No. GB 384 5765 51.
71-75 Shelton Street,
Covent Garden, London, England, WC2H 9JQ
